It has been quite a long time since I posted construction details, so it is memorial day weekend, and I actually accomplished something. Actually, I have had several spurts where I worked on the project, and took photos, but did not post, until now..
Cutting the parts out is 'easy', but then you need to notch and drill most of the parts. After I had the Z-axis head worked out, I created a drawing to guide me out in the shop and for use in determining the table saw cuts. This plate is what the Z-axis motor attaches to, so it is a bit complicated of a part, and it was my first actual part from the MDF. The front cuts were easy since they were 45 degrees. It literally took me two hours then, to figure out my error on the rear cuts layout.
 |
| Basic layout with error fixed |
If you look closely you will see how I laid it out. I marked the midpoint on the left, and then used a square to mark the midpoint on the right. The square must have slipped or moved a bit because when I set up the table saw to the correct angle, I could tell it was a few degrees off. I checked and re-checked many dimensions and all made sense, except it was just not 'right'. So after a lot of analysis, I finally figured out why it was incorrect. It has to be perfect or near-so, or it won't line up with the other parts. The next step is to drill the 'small' holes for bolts and screws. They are easy to lay out with a square and drill with normal drill bits. The lightening holes were more difficult to drill with the holesaw; however, I did figure out later, that the deeper the holesaw got, the more sawdust was in the kerf, which got hot and was not evacuated. This problem was solved by running the shop vac right next to the holesaw as it was turning, and voila, no more burning in the holesaw cuts. I tried using the holesaw half from one side, and then flipping for the other half; but in the end, the best plan was to cut all the way through in on shot, vacuuming the dust out of the kerf as I went, and using a sacrificial base piece so the back side did not tear out, leaving a nice clean exit wound. And the way the top plate sits over the Z-rail I had to recess the T-nuts for the motor by using a forstner bit.
 |
| Bottom of part with recesses added |
 |
| Part dimension drawing |
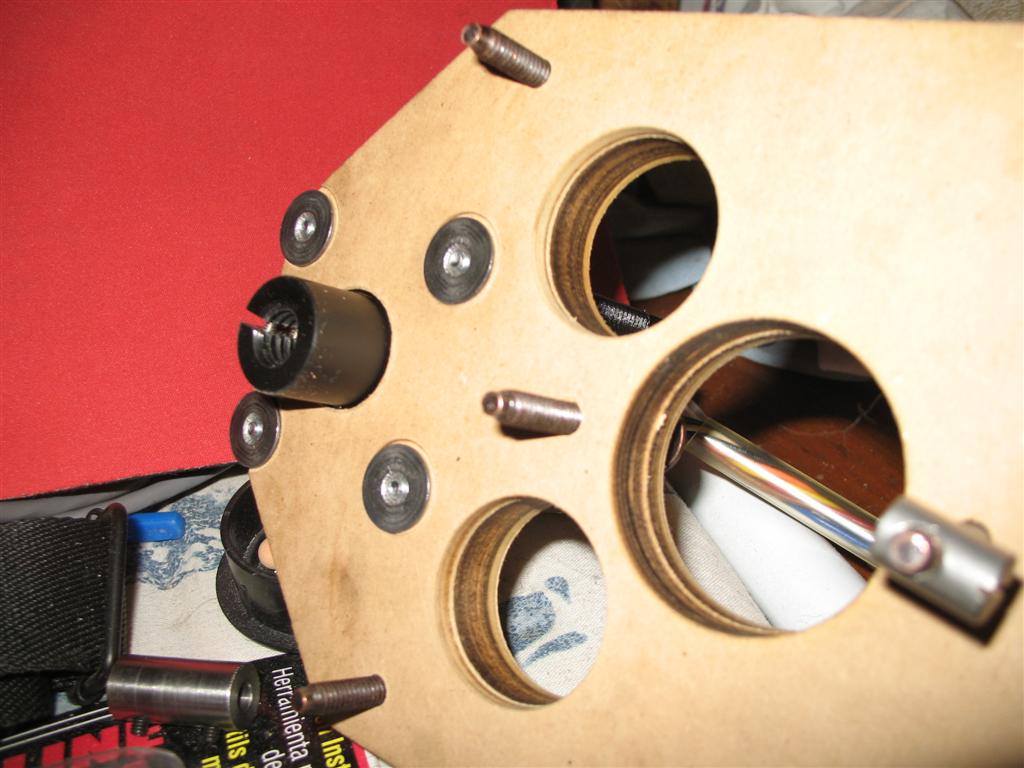
 |
| Close up of T-nut recess |
 |
| Ready to trim back angles-Motor boss recess visible |
 |
| Installing T-nuts |
Then time to do the final trim for weight reduction, now that I had the trim lines accurate. MDF is fairly strong, but also very heavy.
 |
| Miter set-up for trimming rear angles |
I am quite impressed by the accuracy of the thicknes of the MDF with a very consistent 0.75". Probably don't want to get it wet though. The next shot shows the installation of the T-nuts, which are not the standard 'spiked' kind, but with a knurled center stud.
They pull up into the hole and 'can' be removed. You can see why I had to recess the T-nuts here, as I use a socket head bolt to pull them up into the material, where they will stay. This allows me to mount the motor without having a nut protruding on the lower side. I test fit the motor before trimming the corners.
There also is a 'boss' on the face of the motor, so I had to use a holesaw to create a recess for the boss ring to fit into.
 |
| Motor test fit |
 |
| Bottom of motor plate-note coupler clearance |
 |
| Front view of motor base |
[After the fact edit: If you look at the holes I created for lightening the part with hole-saws, you can see they are burnt (a bit). Later I found out how to fix that: as you drill into the material with the hole-saw, use a pecking process and pull the bit out of the material and have a shop vac standing by to suck the kerf dust out of the recess, and you can use a vacuum crevice tool to suck AS you drill also, which removes most of the scarf flotsam and lets the teeth of the bit have free run at new material without the removed material heating up. Doing this with 1/8" deep 'pecks' and vacuuming made the ID's of the holes very virgin.]
Having completed this fairly complex part, I can now move on to the next step.
[Jan2019: a bit of an update. You may have noticed the holesaw holes have some burning on the walls; Later I discovered that that was caused by the leftover sawdust NOT being removed while cutting and adding extra fiction. To combat this, I now use a vacuum with a crevice tool right next to the holesaw bit, as well as interrupting the cut occasionally to let the vac suck the extra sawdust out, which makes near perfect holes with no burning. I also can now cut from only one side which makes the holes much cleaner.]
