Creating the Rails
I have a cool support stand for my chopsaw, so I brought it outside and set it up.
I measured very carefully each part, starting with the long ones first.
 |
| Long ones first-cut to split the line |
 |
| Chopsaw set-up with 12" carbide blade |
 |
| Always pre-trim the end to make sure it is true |
 |
| Look close-measure 42"(from 10, burn 10), then .288" |
 |
| All the rails cut-scrap is on top laying sideways |
 |
| Top view of the parts-nice day |
 |
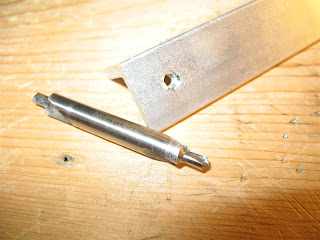
| After careful measuring-microdot, centerpunch, center drill |
 |
| Centerdrill-does not flex; results, then 7/32", then Letter 'I' drill |
 |
| Learn to adjust your drill press speeds |
 |
| 7/32" intermediate holes completed |
 |
| The 16-speed drill press I use |
 |
| Harbor Freight 115 piece HSS drill set: Fractional, Number, Letter |
 |
| The super tapper-$85 at Grizzly |
 |
| Tapper counterweight transfer wheel and support bushing |
 |
| Makes perfectly perpendicular holes with ease |
 |
| Don't forget to use aluminum tapping fluid for nice threads |
 |
| Completed 5/16"-24 threading-I hit it lightly with a chamfer to clean it up |
 |
| So shiny new threads |
 |
| The tap holder assembly-snaps into shaft |
 |
| Preparing to install bearings |
 |
| Snug the allen head bolt tight to the nut |
 |
| Don't over tighten the bearings in the rails-The aluminum is soft |
 |
| Completed X-axis support rails-note stagger on bearing holes |
 |
| End view of rails showing clearance of rail 'points' |

